Today’s post is from Morris Proctor, certified and authorized trainer for Logos Bible Software. Morris, who has trained thousands of Logos users at his two-day Camp Logos seminars, provides many training materials.
The Exegetical Guide houses one of my favorite Logos features, the Word by Word section, which analyzes each Hebrew or Greek word in a passage. Among the wealth of information found here are the manuscript and lemma forms of words, morphological and syntactical data, links to lexicons, and the meaning of the original words as suggested in the Bible Sense Lexicon dataset (not contained in all Logos base packages). Much of my personal Bible study and sermon preparation is spent in this invaluable section.
Word by Word will automatically investigate every word in every verse we’re studying if we like, but this comprehensive coverage can make for a lengthy report. For example, if we’re examining Joshua 1:1–9, the Word by Word section displays data for all nine verses at once! Thus, you may find yourself scrolling through a long list of words.
Here’s a little trick I employ with the Exegetical Guide so that I only research one verse at a time, yet I never have to type anything to move to another verse:
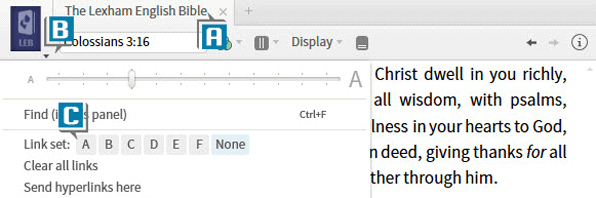
- Open a Bible containing the reverse interlinear option such as The Lexham English Bible (A)
- Choose the panel menu on the Bible (B)
- Select a Link set letter, such as A (C)
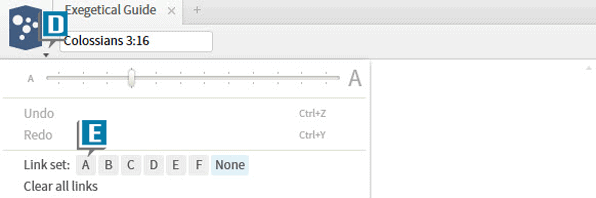
- Choose Guides | Exegetical Guide
- Choose the panel menu on the Exegetical Guide (D)
- Select the same Link set letter you just selected for the Bible (E)
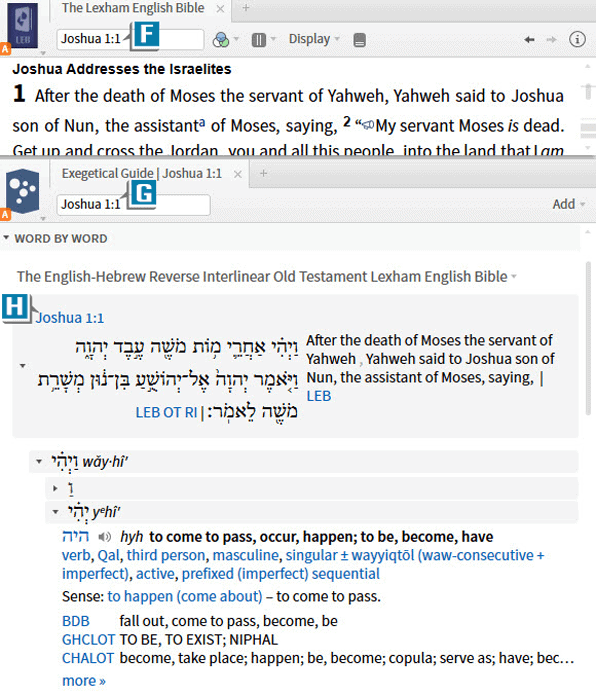
- Type in the Bible’s reference box the first verse in the passage you’re about to study, such as Joshua 1:1 (F)
- Notice that the Exegetical Guide follows the Bible to the same verse because both panels are linked to the same set (G)
- Observe that the Word by Word section is only examining the words in that one verse (H)
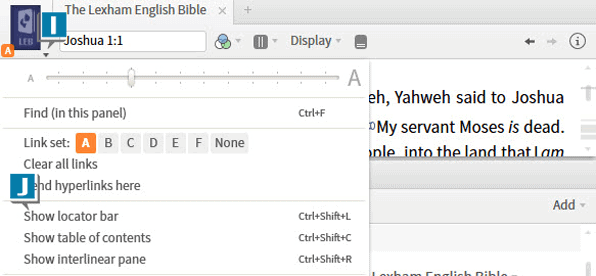
- Choose the panel menu of the Bible (I)
- Select Show locator bar (J)
- Notice the locator bar, appearing under the Bible’s toolbar, contains previous and next arrows (K)
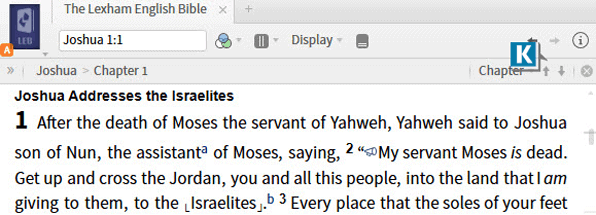
- Click the drop-down list to the left of the previous and next arrows (L)
- Select Verse (M)
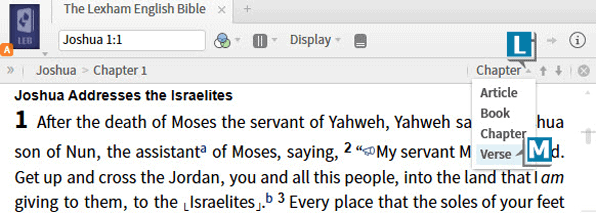
- Note that you have just set the previous and next arrows to take you to the previous or next verse in the Bible
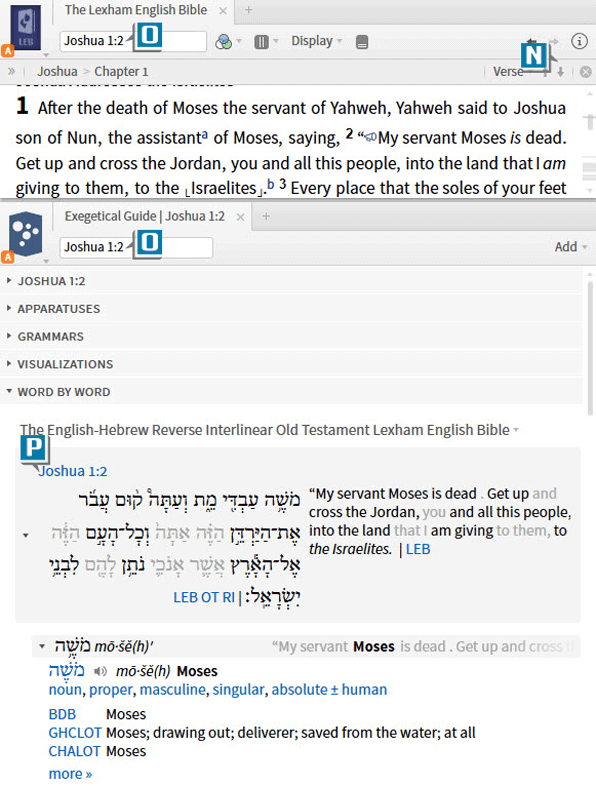
- Click the next (down) arrow (N)
- Watch the Bible AND the Exegetical Guide move to the next verse, such as Joshua 1:2 (O)
- Look in the Word by Word section to see analysis of the words just in verse 2 (P)
You can see that by utilizing linking, the locator bar, and previous and next arrows, we can easily move through a passage a verse at a time without extra typing and scrolling through long lists of words!
If you like this arrangement, don’t forget to save it as a layout so you don’t have to reset the configuration the next time you want to use it.
If you found this trick helpful, you’ll thoroughly enjoy Logos Timesaving Tips, a downloadable Logos video resource with complete video instructions for over 100 helpful Logos features! Get it today.